CLI Reference
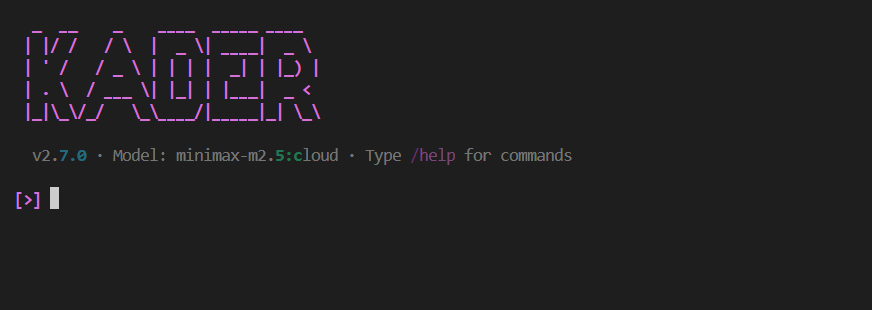
Kader provides two ways to interact: an interactive CLI (full conversational session) and a core CLI (one-shot commands).
Core CLI
The kader command-line tool provides one-shot operations without entering an interactive session.
| Command | Description |
|---|---|
kader |
Launch the interactive AI coding agent |
kader chat -q "query" |
Send a one-shot query to the AI agent (no session persistence) |
kader init |
Initialize .kader directory and generate KADER.md |
kader model |
Show and switch LLM models (supports --agent main\|sub) |
kader sessions |
List saved sessions and resume one (supports --resume <id>) |
kader update |
Check for and install updates |
kader connect |
Connect an LLM provider by setting its API key (supports --provider) |
kader --version / -v |
Show the installed version |
kader --help |
Show help with all commands |
kader chat
Send a one-shot query without session persistence. Tools require confirmation via y/n prompts.
kader chat -q "Write a hello world function in Python"
kader chat --query "Create a README.md for this project"
kader connect
Connect an LLM provider by saving its API key to ~/.kader/.env.
# Interactive provider selection
kader connect

# Skip selection, go straight to API key prompt
kader connect --provider openai
kader connect -p anthropic
kader model
Switch the LLM model for the main agent (orchestrator) or sub agent (executor).
# Interactive agent and model selection
kader model

# Skip agent selection
kader model --agent main
kader model -a sub
kader update
Check PyPI for a newer version. If available, runs uv tool upgrade kader.
kader update
kader init
Analyze the codebase and generate a KADER.md file in .kader/ with build/lint/test commands and code style guidelines.
kader init
kader sessions
List saved conversation sessions and optionally resume one into the interactive app.
# Interactive — list sessions and select one to resume
kader sessions

# Direct — resume a specific session by ID
kader sessions --resume <session-id>
kader sessions -r <session-id>
Sessions are read from ~/.kader/memory/sessions.json.lock and displayed in a Rich table sorted by creation date (newest first). Selecting a session launches the interactive Kader CLI with that session loaded.
Interactive CLI
The interactive CLI provides a full conversational session with tool confirmation, session persistence, and real-time updates.
# Launch the interactive session
kader
Features
- Planner-Executor Workflow — Intelligent agent with reasoning, planning, and tool execution
- Custom Subagents — YAML-defined specialized agents (code reviewer, researcher, etc.)
- Built-in Tools — File system, command execution, web search
- Custom Tools — User-level and project-level tool extension
- Rich Conversation — Beautiful markdown-rendered chat with styled panels
- Session Persistence — Save and load conversation sessions
- Tool Confirmation — Interactive approval for tool execution
- Model Selection — Per-agent model switching (main agent & sub agent)
- Persistent Settings — User preferences stored in
~/.kader/settings.json - Multi-Provider Support — Ollama, Google Gemini, Anthropic, Mistral, OpenAI, and more
Interactive CLI Commands
| Command | Description |
|---|---|
/connect |
Connect a provider by setting its API key |
/help |
Show command reference |
/models |
Switch models per agent (main/sub) |
/clear |
Clear conversation and create new session |
/sessions |
List and load saved sessions |
/skills |
List loaded skills |
/commands |
List special commands |
/cost |
Show usage costs |
/init |
Initialize .kader directory with KADER.md |
/refresh |
Refresh settings and reload callbacks |
/update |
Check for updates and update Kader if newer version available |
/exit |
Exit the CLI |
!cmd |
Run terminal command |
Keyboard Shortcuts
| Shortcut | Action |
|---|---|
Ctrl+C |
Cancel current operation |
Ctrl+D |
Exit the CLI |
Session Management
Sessions are automatically saved to ~/.kader/memory/sessions/<session-id>/. Each session contains:
session.json— Session metadata (ID, title, timestamps)conversation.json— Full conversation historycheckpoint.md— Context summaries from sub-agentsstate.json— Agent state persistence
Use:
/sessions— List all saved sessions and load one/clear— Clear conversation and start a new session
Session Titles
When you start a conversation, Kader automatically generates a title based on your first message. Session titles are displayed in the session list when using /sessions.
Tool Confirmation System
Kader includes an interactive tool confirmation system that prompts for approval before executing tools:
- Safe execution of potentially destructive operations
- Simple
[Y/n/reason]prompt for quick approval - Ability to provide context when rejecting a tool
Skills System
Skills are loaded from:
~/.kader/skills/— User-level skills./.kader/skills/— Project-level skills
Use /skills to list all available skills.
Skill File Format
---
name: python-expert
description: Expert in Python programming and best practices
---
# Python Expert Skill

You are an expert Python developer...
Subagents
Subagents are specialized agents that the planner can delegate tasks to. They are defined as YAML files and automatically discovered.
Subagent Locations
./.kader/subagents/— Project-level subagents (always enabled)~/.kader/subagents/— User-level subagents (gated by settings.json)
Subagent File Format
name: code-reviewer
objective: Use for code review tasks including analyzing code quality,
  finding bugs, and suggesting improvements
system_prompt: |
  You are an expert code reviewer...
tools:
  - read_file
  - grep
  - glob
User-Level Subagent Configuration
User-level subagents are controlled via ~/.kader/settings.json:
{
  "subagents": [
    { "name": "code-reviewer", "enabled": "true" },
    { "name": "research-agent", "enabled": "false" }
  ]
}
Subagent UI Context
When the planner delegates tasks to an executor or custom subagent, the CLI shows distinct visual indicators to help you understand which agent is executing:
[Kader is thinking... spinner]

[^^] Executor Started
│ Entering subagent mode — actions are now executed by Executor │

[Executor is working... spinner]

  ⚡ [executor] read_file: Analyzing codebase structure...
  [+] [executor] read_file completed successfully
  [✓] Executor finished
  [+] executor completed successfully
Visual indicators:
- Entry banner: Cyan
[^^] Executor Startedpanel - Context prefix:
⚡ [executor] read_file:in tool messages - Dynamic spinner: Shows
Executor is working...instead of generic thinking - Exit footer:
[✓] Executor finishedon completion
Special Commands
Commands are loaded from:
./.kader/commands/— Project-level commands (higher priority)~/.kader/commands/— User-level commands
Use /commands to list all available special commands.
Creating a Command
Commands can be defined in three formats:
Option 1: Directory format (with additional files)
mkdir -p ~/.kader/commands/mycommand
~/.kader/commands/mycommand/
├── CONTENT.md          # Main command instructions
├── templates/          # Optional - templates
└── assets/            # Optional - files
Option 2: Simple file format
# Just create a .md file directly
~/.kader/commands/mycommand.md
Option 3: Directory with sub-commands
~/.kader/commands/mycommand/
├── CONTENT.md           # Main command (/mycommand)
├── subcommand1.md      # Sub-command (/mycommand/subcommand1)
├── subcommand2.md      # Sub-command (/mycommand/subcommand2)
├── templates/           # Optional - shared templates
└── assets/             # Optional - shared assets
CONTENT.md or .md file format:
---
description: What this command does
---
# Command Instructions

Your command agent instructions here...
Using Commands
Execute a command with:
/mycommand
/mycommand do something specific
/mycommand/subcommand specific task
Example: Lint and Test Command with Sub-commands
Custom Tools
Custom tools extend agent capabilities beyond built-in tools. Tools can be added at user-level or project-level.
Tool Locations
- Project-level:
./.kader/custom/tools/(auto-loaded, always enabled) - User-level:
~/.kader/custom/tools/(requires configuration in settings.json)
Creating a Custom Tool
Create a Python file in the tools directory that defines a class extending BaseTool:
from kader.tools.base import BaseTool, ParameterSchema, ToolCategory

class MyTool(BaseTool[str]):
    def __init__(self):
        super().__init__(
            name="my_tool",
            description="What my tool does",
            parameters=[
                ParameterSchema(
                    name="param1",
                    type="string",
                    description="Parameter description",
                    required=True,
                ),
            ],
            category=ToolCategory.UTILITY,
        )

    def execute(self, **kwargs: Any) -> str:
        param1 = kwargs.get("param1", "")
        return f"Processed: {param1}"

    async def aexecute(self, **kwargs: Any) -> str:
        return self.execute(**kwargs)

    def get_interruption_message(self, **kwargs: Any) -> str:
        return f"execute my_tool"
Agent Targeting
Custom tools can be assigned to specific agents:
For user-level tools (in settings.json):
{
  "tools": [
    {
      "name": "my_tool.MyTool",
      "enabled": "true",
      "agent": "executor"
    }
  ]
}
Agent options: planner | executor | both (default)
For project-level tools (in tool directory):
Create an agent.json file in the tool directory:
{
  "agent": "both"
}
Example: DateTimeTool
Project-level tool at .kader/custom/tools/datetime_tool/:
.kader/custom/tools/datetime_tool/
├── __init__.py
└── agent.json
agent.json:
{
  "agent": "both"
}
User-Level Tools Configuration
User-level tools must be explicitly enabled in ~/.kader/settings.json:
{
  "main-agent-provider": "ollama",
  "main-agent-model": "glm-5:cloud",
  "tools": [
    { "name": "my_tool", "enabled": "true", "agent": "executor" },
    { "name": "other_tool", "enabled": "false", "agent": "both" }
  ]
}
name: The filename (without.pyextension) containing the tool class, ormodule.ClassNameenabled:"true"to enable,"false"to disableagent:"planner","executor", or"both"
Project-Level Tools
Project-level tools in ./.kader/custom/tools/ are automatically discovered and loaded. They don't require any configuration — just add the tool to the directory.
Refresh Command
Use /refresh to reload settings and tools without restarting the CLI:
- Reloads
settings.jsonfrom disk - Re-discovers project-level tools
- Re-loads user-level tools based on updated settings
This is useful when:
- Adding new tools to your project
- Enabling/disabling tools in settings
- Changing model or provider settings
Directory with sub-commands:
~/.kader/commands/lint-test/
├── CONTENT.md     # Main command: /lint-test
├── lint.md        # Sub-command: /lint-test/lint
└── test.md        # Sub-command: /lint-test/test
lint.md:
---
description: Run only linting
---
Run linting only using ruff.
test.md:
---
description: Run only tests
---
Run tests only using pytest.
Usage:
/lint-test- Run full lint and test/lint-test/lint- Run linting only/lint-test/test- Run tests only
Callbacks System
Kader supports callbacks — custom code that hooks into various stages of agent execution. Callbacks can modify tool arguments, log events, transform responses, and more.
Callback Locations
Callbacks are loaded from two locations:
./.kader/custom/callbacks/— Project-level callbacks (auto-loaded, always enabled)~/.kader/custom/callbacks/— User-level callbacks (require configuration in settings.json)
Creating a Callback
Create a Python file in the callbacks directory that defines a class extending BaseCallback, ToolCallback, or LLMCallback:
from kader.callbacks.tool_callbacks import ToolCallback

class MyCallback(ToolCallback):
    """Custom callback that modifies tool behavior."""

    def __init__(self, enabled: bool = True):
        super().__init__(tool_names=["execute_command"], enabled=enabled)

    def on_tool_before(self, context, tool_name: str, arguments: dict) -> dict:
        """Called before tool execution."""
        # Modify arguments before execution
        return arguments
Available Callback Base Classes
| Class | Description |
|---|---|
BaseCallback |
Abstract base class for all callbacks |
ToolCallback |
For tool execution events (before/after) |
LLMCallback |
For LLM invocation events (before/after) |
Callback Events
| Event | Description |
|---|---|
on_tool_before |
Called before a tool is executed |
on_tool_after |
Called after a tool is executed |
on_agent_start |
Called when agent starts execution |
on_agent_end |
Called when agent finishes execution |
on_llm_start |
Called before LLM is invoked |
on_llm_end |
Called after LLM response is received |
on_error |
Called when an error occurs |
User-Level Callbacks Configuration
User-level callbacks must be explicitly enabled in ~/.kader/settings.json:
{
  "callbacks": [
    { "name": "my_callback", "enabled": "true" },
    { "name": "other_callback", "enabled": "false" }
  ]
}
Project-Level Callbacks
Project-level callbacks in ./.kader/custom/callbacks/ are automatically discovered and loaded without any configuration.
Refresh Command
Use /refresh to reload settings and callbacks without restarting the CLI.
Connect Command
The /connect command provides an interactive way to set up provider API keys without manually editing ~/.kader/.env:
- Provider selection — Shows an interactive radio-button list of all supported providers with arrow-key navigation
- API key input — Prompts you to enter or paste the API key for the selected provider
- Automatic saving — Saves the key to
~/.kader/.envand loads it into the current session
After connecting a provider, use /models to browse available models from that provider.
Model Selection
The /models command uses a two-step interactive flow:
- Agent selection — Choose which agent to update (Main Agent or Sub Agent)
- Model selection — Browse and pick from all available provider models
Features:
- Configure main (planner) and sub (executor) agents independently
- See the current model for the selected agent
- Changes are persisted to
~/.kader/settings.json
Settings
User preferences are stored in ~/.kader/settings.json, auto-created on first run:
{
  "main-agent-provider": "ollama",
  "sub-agent-provider": "ollama",
  "main-agent-model": "glm-5:cloud",
  "sub-agent-model": "glm-5:cloud",
  "auto-update": false,
  "callbacks": []
}
Settings update automatically when switching models via /models. The ~/.kader/custom/callbacks directory is also created automatically.
Available Settings
| Field | Description | Default |
|---|---|---|
main-agent-provider |
LLM provider for the planner agent | ollama |
sub-agent-provider |
LLM provider for executor sub-agents | ollama |
main-agent-model |
Model name for the planner agent | glm-5:cloud |
sub-agent-model |
Model name for executor sub-agents | glm-5:cloud |
auto-update |
Automatically update Kader on startup | false |
callbacks |
List of user-level callbacks to enable | [] |
Auto-Update
When auto-update is set to true, Kader will automatically check for and install updates on every startup. The update is performed silently using uv tool upgrade kader.
Update Command
You can also manually check for updates using the /update command:
- If a newer version is available, it will upgrade Kader and restart the CLI
- If you're already on the latest version, it will display a confirmation message
Supported Providers
| Provider | Format | Example |
|---|---|---|
| Ollama (local) | ollama:model |
ollama:llama3 |
| Ollama (cloud) | ollama:model:cloud |
ollama:minimax-m2.5:cloud |
| Google Gemini | google:model |
google:gemini-2.5-flash |
| Mistral | mistral:model |
mistral:small-3.1 |
| Anthropic | anthropic:model |
anthropic:claude-3.5-sonnet |
| OpenAI | openai:model |
openai:gpt-4o |
| Moonshot | moonshot:model |
moonshot:kimi-k2.5 |
| Z.ai | zai:model |
zai:glm-5 |
| OpenRouter | openrouter:model |
openrouter:anthropic/claude-3.5-sonnet |
| OpenCode | opencode:model |
opencode:claude-3.5-sonnet |
| Groq | groq:model |
groq:llama-3.3-70b-versatile |
Setting API Keys
API keys can be set interactively using /connect in the CLI. Alternatively, set them directly:
# Ollama Cloud (get from https://ollama.com/settings)
export OLLAMA_API_KEY="your-ollama-api-key"

# Google Gemini
export GOOGLE_API_KEY="your-google-api-key"

# Other providers...
export ANTHROPIC_API_KEY="your-anthropic-api-key"
export MISTRAL_API_KEY="your-mistral-api-key"
export OPENAI_API_KEY="your-openai-api-key"
export MOONSHOT_API_KEY="your-kimi-api-key"
export ZAI_API_KEY="your-glm-api-key"
export OPENROUTER_API_KEY="your-openrouter-api-key"
export GROQ_API_KEY="your-groq-api-key"